You might not realize that a small leak in your water heater can lead to significant damage over time, impacting your home and wallet. When you notice water pooling around the unit, acting quickly to prevent further issues is essential. First, you’ll want to identify the source of the leak and assess the situation carefully. However, the following steps could determine whether you’ll need to call in a professional or if you can handle it yourself. Let’s explore the most effective ways to tackle this problem.
Identify the Source of the Leak
Before you can address a leaking water heater, you need to pinpoint its source. Start by visually inspecting the heater for any signs of water accumulation. Common leak locations include the inlet and outlet connections, the drain valve, and the tank.
Examine the inlet and outlet connections first. If you see moisture around these fittings, tightening the connection may resolve the issue. Next, check the drain valve, which can sometimes become loose or damaged. If it’s leaking, you might need to replace it or tighten it securely.
If these areas seem fine, inspect the tank itself. Look for signs of corrosion or rust, indicating a more serious problem. In this case, the tank may deteriorate internally, leading to leaks.
Lastly, consider the temperature and pressure relief valve. A malfunctioning valve might discharge water, which can be mistaken for a leak.
Assess the Severity of Damage
Once you’ve identified the source of the leak, it’s crucial to evaluate the severity of the damage to determine your next steps. Start by inspecting the area around the leak for signs of water accumulation. Look for puddles, damp spots, or mold growth, indicating significant water exposure and potential structural damage.
Next, examine the components of your water heater. Check for corrosion, rust, or any visible cracks in the tank or pipes. If you notice that the leak is coming from the tank itself, it’s often a sign of severe deterioration, potentially necessitating a replacement. For minor leaks, focus on connections, valves, and fittings, which are often fixable with simple tightening or sealing.
Evaluate the impact on your home’s interior. Water damage can lead to costly repairs if left unaddressed, especially in drywall, flooring, or insulation. Documenting the damage with photos can also be helpful for insurance claims. By accurately evaluating the severity of the damage now, you’ll be better equipped to decide whether to tackle repairs yourself or call in a professional.
Turn Off the Water Supply
After evaluating the damage, the next step is to turn off the water supply to your water heater. This action is essential for preventing further water leakage and minimizing potential damage to your home. Locate the shut-off valve on the cold water line leading into your water heater. The valve is usually a round or lever-style handle.
Rotate the valve clockwise to turn off the water supply until it stops. If it’s a lever, simply pull it to a perpendicular position relative to the pipe. Verify the valve is completely closed by checking for dripping or leaking water.
If you can’t find the valve or it’s stuck, you may need to shut off your home’s main water supply. This is usually located near where the water line enters your house. Turning off the main supply will halt water flow throughout your home, allowing you to manage the situation safely.
Once you’ve turned off the water supply, it’s time to address the leak or call a professional plumber for assistance. These steps guarantee you protect your property and can effectively resolve the issue.
Drain the Water Heater
Locate the drain valve to drain the water heater, which is typically found at the bottom of the unit. This process helps remove sediment buildup and guarantees peak performance. Here’s how to proceed:
- Gather Materials: You’ll need a garden hose, a bucket, and a flathead screwdriver.
- Attach the Hose: Connect one end of the garden hose to the drain valve and place the other in a bucket or outside to direct the water flow.
- Open the Valve: Use the screwdriver to turn the valve counterclockwise. Ultimately, allow the water to flow out, ensuring it’s cool to the touch to avoid burns.
- Flush the Tank: Briefly turn on the cold water supply to flush out any remaining sediment after draining. This step enhances efficiency and lifespan.
Close the drain valve securely once the water has fully drained and the sediment is cleared. Remember to remove the hose and check for any leaks around the valve. This maintenance task is essential for guaranteeing your water heater serves your household effectively.
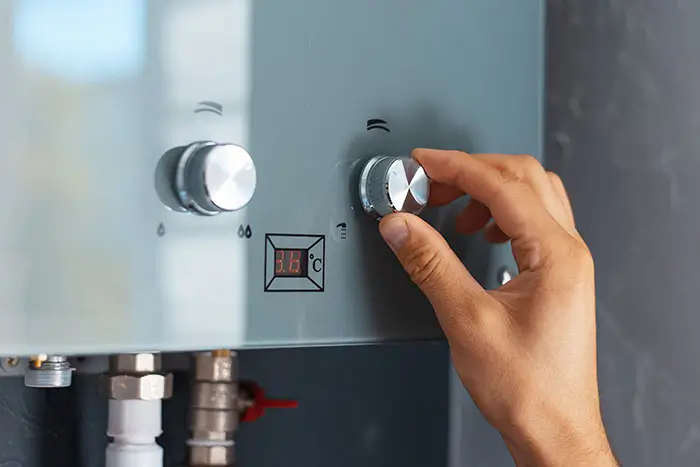
Check the Temperature and Pressure Relief Valve
Following the draining process, it is essential to check the temperature and pressure relief (TPR) valve on your water heater. This component guarantees that your unit operates safely and prevents excessive pressure buildup, which could lead to catastrophic failure.
To check the valve, locate it on the top or side of your water heater. First, inspect it visually for any signs of corrosion or leakage. If you notice any damage, replacing the valve immediately is imperative. Next, test the valve by gently lifting the lever. You should hear a rush of water entering the drainpipe. If nothing happens or water leaks from the valve, it may be defective and need replacement.
Remember to exercise caution when performing this check. Hot water can be released, so wearing protective gear and standing clear of the discharge path is wise. Regular maintenance of the TPR valve not only safeguards your safety but also extends the lifespan of your water heater. Consult a professional plumber if you’re unsure about any aspect of this process. Your diligence can help prevent further issues down the line.
Inspect the Drain Valve
If you suspect your water heater leaks, inspecting the drain valve is essential. The drain valve is a critical component that allows you to flush the tank and remove sediment buildup. A faulty or damaged drain valve can lead to leaks, so it’s vital to check it carefully.
Follow these steps to inspect the drain valve:
- Visual Inspection: Look for any signs of water pooling around the valve or corrosion indicating a potential leak.
- Tightness Check: Verify the valve is tightly closed. A loose valve can cause water to escape.
- Test for Leaks: Carefully open the valve slightly to see if water leaks. If it leaks when closed, it may need replacement.
- Evaluate the Condition: If the valve feels brittle or shows significant wear, consider replacing it to prevent future leaks.
Examine the Tank for Corrosion
While inspecting your water heater, examining the tank for corrosion is crucial. Corrosion can weaken the tank, leading to leaks and potential failure. Start by visually checking the exterior for any signs of rust or pitting. These indicators often point to a compromised tank that could eventually lead to a leak.
Next, look at the anode rod if your model has one. This rod helps prevent corrosion by attracting corrosive elements in the water. If it’s heavily corroded or depleted, it’s time to replace it. A well-maintained anode rod can greatly extend the life of your water heater.
Remember to check the bottom of the tank, as this area is prone to accumulating sediment and moisture, which can accelerate corrosion. If you notice any unusual discoloration or a wet spot, you might face a more serious issue.
If corrosion is extensive, consider consulting a professional. Ignoring these signs could lead to more severe problems, including water damage to your home. By addressing corrosion early, you can guarantee a longer lifespan for your water heater and maintain a safe environment for those you serve.
Look for Pipe Connections Issues
After checking for corrosion on the tank, inspecting the pipe connections for any issues is important. Leaks often occur at these joints due to wear, improper installation, or temperature changes. Start by examining the following key areas:
- Threaded Connections: Look for water pooling around the threads; this can indicate a loose or damaged connection.
- Solder Joints: Inspect soldered seams for cracks or corrosion, as these can weaken over time and lead to leaks.
- Flex Hoses: Check any flexible hoses for kinks, cracks, or bulges that can signal a potential failure point.
- Valves: Verify that all valves are properly sealed and functioning. A faulty valve can contribute to leaks at the connection points.
If you notice any of these issues, addressing them promptly is essential. Ignoring small leaks can lead to more significant problems down the line. Your diligence in checking these connections helps maintain your water heater’s efficiency and protects your home from potential water damage.
Determine if You Can DIY
Can you handle the repairs yourself, or should you call a professional? Evaluating your comfort level with plumbing repairs is essential. First, consider your experience. If you’ve dealt with basic plumbing tasks, such as tightening connections or replacing washers, you might have the skills for minor leaks. Familiarize yourself with the specific components of your water heater, including the tank, pressure relief valve, and inlet/outlet pipes.
Next, analyze the type of leak. Tools and plumbing tape might make small leaks from fittings or valves manageable. However, if the leak originates from the tank, it often indicates a more serious issue, possibly requiring replacement.
Before diving in, verify that you have the right tools, such as wrenches, screwdrivers, and a bucket. Additionally, read your water heater’s manual for guidance on safety precautions and maintenance practices.
If you feel uncertain about the process at any point, err on the side of caution. It’s always better to prioritize safety and effectiveness, which may mean enlisting the help of a professional. You aim to guarantee a safe and efficient repair that serves you and future users.
When to Call a Professional
How do you know when it’s time to call a professional for your water heater issues? While some minor problems can be resolved with DIY solutions, signs indicate that you should seek expert help. Ignoring these signs could lead to further damage or safety hazards.
Here are four situations when you should definitely call a professional:
- Persistent Leaks: If water leaks despite your attempts to fix it, an underlying issue may require specialized tools and knowledge.
- Unusual Noises: If your water heater makes strange sounds, such as popping or rumbling, it could indicate sediment buildup or internal damage that requires a professional assessment.
- Temperature Fluctuations: A professional can diagnose and repair potential thermostat or heating element issues if the water temperature is inconsistent or scalding hot.
- Age of the Unit: If your water heater is over 10 years old and showing signs of trouble, it’s wise to consult a professional for an evaluation or replacement options.
Conclusion
If you find your water heater leaking, act swiftly to minimize damage. Picture the steady drip of water pooling beneath your unit; each drop is a reminder of urgency. You can prevent further issues by identifying the source, shutting off the supply, and draining the tank. Whether you tackle minor repairs or call a professional, staying proactive guarantees your water heater remains efficient. Regular check-ups will keep it running smoothly, letting you enjoy hot water without worry.